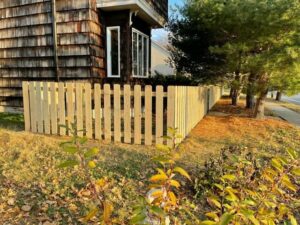
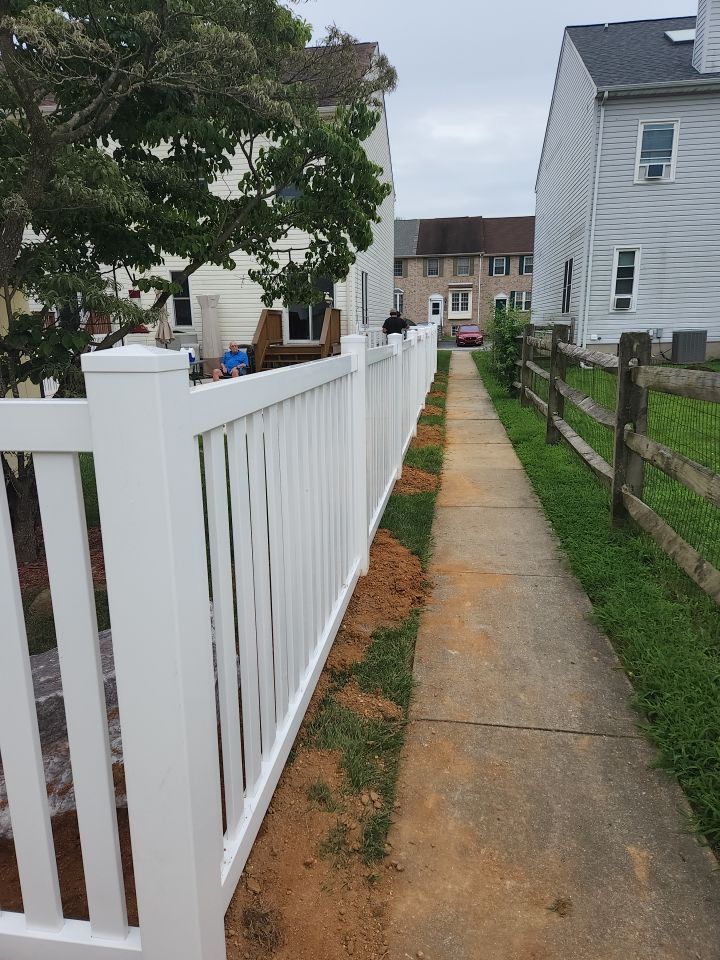
Nothing creates a feeling of nostalgia and small-town simplicity like a picket fence. These quaint pieces of Americana will never go out of style, thanks to their connections with classic art, film, television, and the homestead feel. They are not only aesthetically pleasing but also functional and practical.Picket fences allow children and pets to play safely in the front or backyard. They provide privacy and security while boosting curb appeal with their iconic style. Read on to learn how to install a picket fence and add a classy and easily maintained feature to your property line.
Table of Contents
The Steps to Picket Fence Installation
At Leading Edge Fence & Gates, we supply the highest-quality materials for all types of picket fences. Whether you’re looking to construct a wood or vinyl picket fence for your home or business, our experienced team can help. If you follow the steps below, your fence will stand strong and look great for years to come.
1. Collect Your Tools and Materials
Learning how to install a white picket fence is not as complicated as you might fear. Before you attempt to build a picket fence, make sure you have all the tools and materials you’ll need. Aside from the materials provided by the experts at Leading Edge Fence & Gates, you will need
- Measuring tape
- Post hole digger or auger
- Twine or string
- Wooden stakes
- Marking spray paint
- Gravel
- Fast-setting concrete mix
- Shovel
- Post level
- Bucket
- Bricks or pavers
- Drill or impact driver
2. Plan the Layout
Before purchasing your fencing materials, map out the area where you’ll be installing the fence using your twine and wooden stakes. Doing so will give you a clear idea of the space you are working with and allow you to determine how many fencing panels you will need. Fencing panels are typically eight feet long.Use wooden stakes to mark the places for the corner posts and end posts. It is crucial to mark these spots with precision to avoid major errors that will cost you a lot of time and physical labor. Once the corner post points are all in line, use your twine, tape measure, and marking spray paint to determine where the line posts will sit on the fence line. The spacing and placement of the post holes will depend on the length of your fencing panels and the need for a gate on the fence. A gate may not be necessary if you’re building a backyard fence. However, a front yard fence usually needs a gate to the house’s front door.
3. Begin Digging
Once you’ve marked and measured the fence post areas, you can begin digging. Using a post-hole digger or an auger, dig out a hole for each post. The depth of the hole will depend on the length of the post. If the fencing panels are four feet high, the fence posts should be six feet high. In this case, the depth of the post hole should be about 18 inches. This strategy allows for a good amount of the post to go in the ground with plenty of space to attach the post caps and fence panels.
4. Set the Posts
Put a layer of gravel in each hole before the fence posts go in. Once a post goes into a hole, use the post level to check that it is plumb. Pour the fast-setting concrete into the hole to stabilize the post. You don’t have to fill the hole completely with concrete. It’s better to leave some room at the top to fill with dirt for a more natural look once the concrete dries. You can also add some grass seed to the soil to make the area at the base of the post look fuller.
5. Install the Fencing Panels
Once the concrete is dry, and all the fence posts are in position, you can begin to install the fence panels. Follow these steps for each panel:
- Position the panel up against the post
- Place pavers or bricks underneath the panel to get it into position
- Use a level on the top of the panel to make sure it is straight
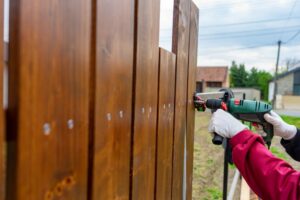
- Use a drill to attach the panel to the post with decking screws
6. Attach the Post Caps
Post caps seem like an addition to the fence that is purely for decoration. However, the end grain on the posts will rot and fall apart if exposed to rain and snow. Post caps can add years to the life of your fence. Depending on the manufacturer, the post caps will adhere to the post ends with adhesive or screws. Do not use an alternate method to attach the post caps other than what the instruction manual calls for.
Contact Leading Edge Fence & Gates Today!
Do you now feel like you know how to install a picket fence? If not, don’t worry. Our experts at Leading Edge Fence & Gates have decades of experience working with all types of picket fences. Whether you want to build a traditional wood fence or a vinyl picket fence, our dedicated and knowledgeable staff can help you with colors, materials, and installation. Since 1993, Leading Edge Fence & Gates has been performing installations for clients all over the greater Newark, DE, area. Call us today at (302) 892-2575, and let us help you build the fence you’ve been dreaming of.