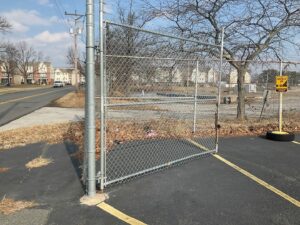

A chain link fence offers a practical way to define property boundaries, secure outdoor areas, and maintain visibility across your yard. Whether you want to enclose a residential property or secure a larger area, understanding the installation process can help you prepare for the project.
Chain link fence installation involves several steps, from discussing your requirements to setting posts, installing the mesh, and fitting any gates. Each stage contributes to the fence’s stability and overall appearance. Knowing what to expect can help you make informed decisions about the layout, materials, and customization options for your property.
1. Start With a Consultation and Project Planning
The process begins with a discussion about your fencing needs. Consider the purpose of the fence, the area you want to enclose, and the level of visibility or security you need. These details help determine the appropriate fence layout and design.
Property measurements also play an important role. The installation plan should account for corners, changes in ground elevation, access points, and the locations of any gates. Clear planning helps establish the materials and work required for the project.
During this stage, discuss any customization preferences. Leading Edge Fence & Gates offers chain link fencing with options that can include colored coatings, privacy slats, and additional security features. Reviewing these choices before installation helps you determine which features suit your property.
2. Choose Your Fence Design and Customization Options
Chain link fencing comes in different configurations, allowing property owners to choose an appearance and level of privacy that suit their needs. The appropriate design depends on the property’s layout, intended use, and budget.
Standard chain link fencing provides a visible boundary while allowing airflow and sightlines through the mesh. For homeowners who want additional privacy, vinyl slats can be woven through the diamond-shaped openings. These slats also provide an opportunity to introduce color into the fence design.
Other available options may include black or green coatings that help the fence blend with its surroundings. Additional security features, such as barbed wire or mini-mesh fabric, may be appropriate for certain properties, subject to applicable requirements.
Discuss your preferences before the chain link fence installation begins. Choosing the configuration early helps ensure the necessary materials are included in the project plan.
3. Prepare the Property and Set the Fence Posts
Once the project plan is established, the installation team prepares the site and marks the fence line. This stage helps confirm the intended layout and identify any obstacles that could affect the work.
Installers then establish the locations for the fence posts. These posts form the structure that supports the chain link mesh, so their placement and alignment are important. Corner and end posts also help maintain the tension needed to keep the mesh in position.
According to the company’s published installation process, concrete is poured at the property to secure the posts. The concrete needs sufficient time to set before the installation proceeds. Proper post placement and secure foundations help create a stable fence that can withstand normal use and environmental exposure.
4. Install the Chain Link Mesh and Gates
After the concrete has set, the installation team moves on to the remaining fence components. The chain link mesh is attached to the posts and tensioned to create a consistent appearance along the fence line.
Proper tension helps prevent excessive sagging and keeps the mesh securely positioned. Installers also check the alignment of the fence components to ensure the finished installation follows the planned layout.
If the project includes a custom chain link gate, its construction and installation are coordinated with the fencing work. Leading Edge Fence & Gates describes preparing custom chain link gates while the post concrete sets, allowing the team to install the gates once the posts are ready.
Gate placement should provide convenient access while fitting the overall fence design. Confirming the gate location and opening direction during planning helps avoid unnecessary adjustments later.
5. Complete the Installation and Review the Finished Fence
Once the mesh and gates are installed, the completed fence should be checked for alignment, stability, and proper operation. The posts should remain secure, the mesh should be consistently tensioned, and any gates should open and close as intended.
The final review also provides an opportunity to check the fence’s overall appearance. If you selected colored coatings or privacy slats, confirm that these features match the agreed design.
Before the project is considered complete, discuss any questions about the installation with the contractor. Understanding the finished layout and the features included in your project helps ensure the result meets your expectations.
The time required for chain link fence installation depends on the length of the fence, site conditions, gate requirements, and selected customization options. Concrete setting time and other project-specific factors can also affect the schedule.
Get Started With Chain Link Fence Installation
Understanding the installation process helps you prepare for each stage, from planning the layout and choosing customization options to securing the posts and installing the mesh. Careful preparation and proper installation are essential for a stable, functional fence.
Leading Edge Fence & Gates provides chain link fencing and installation services, with options for different property needs and design preferences. Call (302) 892-2575 to discuss your project and request a free estimate.